Create a dataset for Data Discovery - Beta 🧪
note
- At this time, we only support building datasets from a bucket of unstructured data, meaning that the data must be in individual files rather than a structured format such as CSV or JSON.
- To create a new dataset, your user role must have Owner or Administrator permissions.
Before you begin
Datasets are retrieved from your cloud storage environment. As such, you will need to provide the appropriate access key to pull data from your cloud environment.
If you are using a firewall, ensure you whitelist the following IP addresses (in addition to the app.humansignal.com range):
34.85.250.23535.245.250.13935.188.239.181
Datasets using AWS
Requirements:
- Your data is located in an AWS S3 bucket.
- You have an AWS access key with view permissions for the S3 bucket.
- Your AWS S3 bucket has CORS configured properly. Configuring CORS allows you to view the data in Label Studio. When CORS is not configured, you are only able to view links to the data.
Configure CORS for the AWS S3 bucket
Prerequisites:
You have edit access to the bucket.
Configure CORS access to your bucket
Set up cross-origin resource sharing (CORS) access to your bucket using a policy that allows GET access from the same host name as your Label Studio deployment.
You can use the AWS Management Console, the API, or SDKs. For more information, see Configuring cross-origin resource sharing (CORS)
You can use or modify the following example:
[
    {
        "AllowedHeaders": [
            "*"
        ],
        "AllowedMethods": [
            "GET"
        ],
        "AllowedOrigins": [
            "*"
        ],
        "ExposeHeaders": [
            "x-amz-server-side-encryption",
            "x-amz-request-id",
            "x-amz-id-2"
        ],
        "MaxAgeSeconds": 3000
    }
]
Create an AWS access key
Prerequisites:
- You must have the admin permissions in your AWS account to generate keys and create service accounts.
For more information on completing the following steps, see the following pages in the AWS user guides:
Creating an IAM user in your AWS account
Managing access keys for IAM users
Policies and permissions in IAM
Create a policy for the user
You need a permissions policy that can list S3 buckets and read objects within buckets. If you already have a policy that does this, or if you feel comfortable using the pre-configured AmazonS3ReadOnlyAccess policy, then you can skip this step.
From the AWS Management Console, use the search bar or navigation menu to locate the IAM service.
Select Access Management > Policies from the menu on the left.
Click Create policy.
From the policy editor, select the JSON option and paste the following:
{
    "Version": "2012-10-17",
    "Statement": [
        {
            "Effect": "Allow",
            "Action": [
                "s3:ListBucket",
                "s3:GetObject"
            ],
            "Resource": "*"
        }
    ]
}
If you want to further restrict the permissions to certain buckets, edit the
Resourcekey as follows:"Resource": [ "arn:aws:s3:::<your_bucket_name>", "arn:aws:s3:::<your_bucket_name>/*" ]
Create a user
This user can be tied to a specific person or a group.
From the AWS Management Console, use the search bar or navigation menu to locate the IAM service.
Select Access Management > Users from the menu on the left.
Click Create user.
Enter a descriptive name for this user, such as “Label_Studio_access”.
Leave Provide user access to the AWS Management Console unselected. Click Next.
Select Attach policies directly.
Under Permissions policies, use the search field to find and select the policy you are using with the user (see above). Click Next.
Click Create user.
Generate an access key for the user
From the Users page, click the user you created in the previous section.
Click the Security Credentials tab.
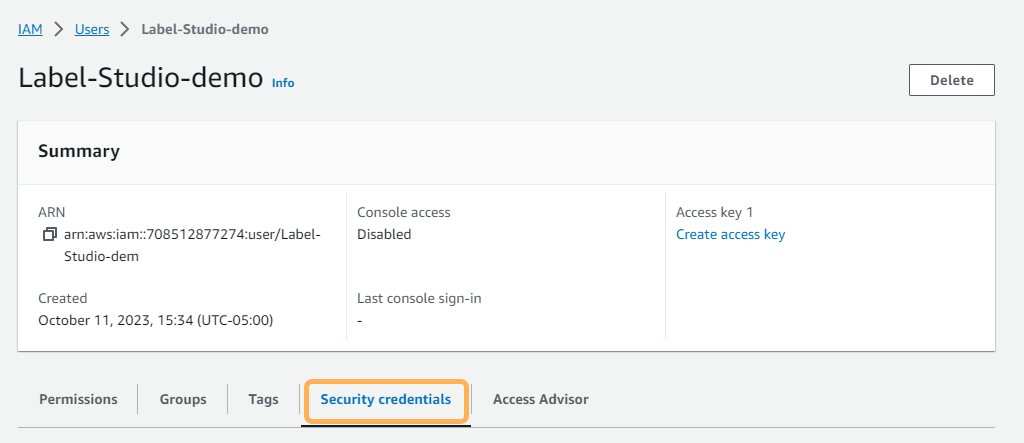
Scroll down to Access keys and click Create access key.
Select Other and note the recommendations provided by AWS. Click Next.
Optionally, add a description for the key.
Click Create access key.
Copy the access key ID and your secret access key and keep them somewhere safe, or export the key to a CSV file.
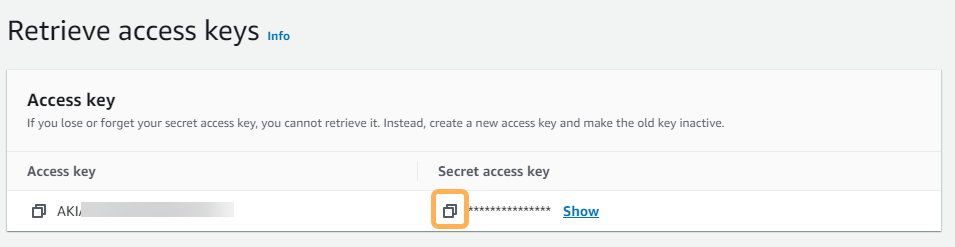
Important
This is the only time you will be able to copy the secret access key. Once you click Done, you will not be able to view or copy it again.
Click Done.
Create a dataset from an AWS S3 bucket
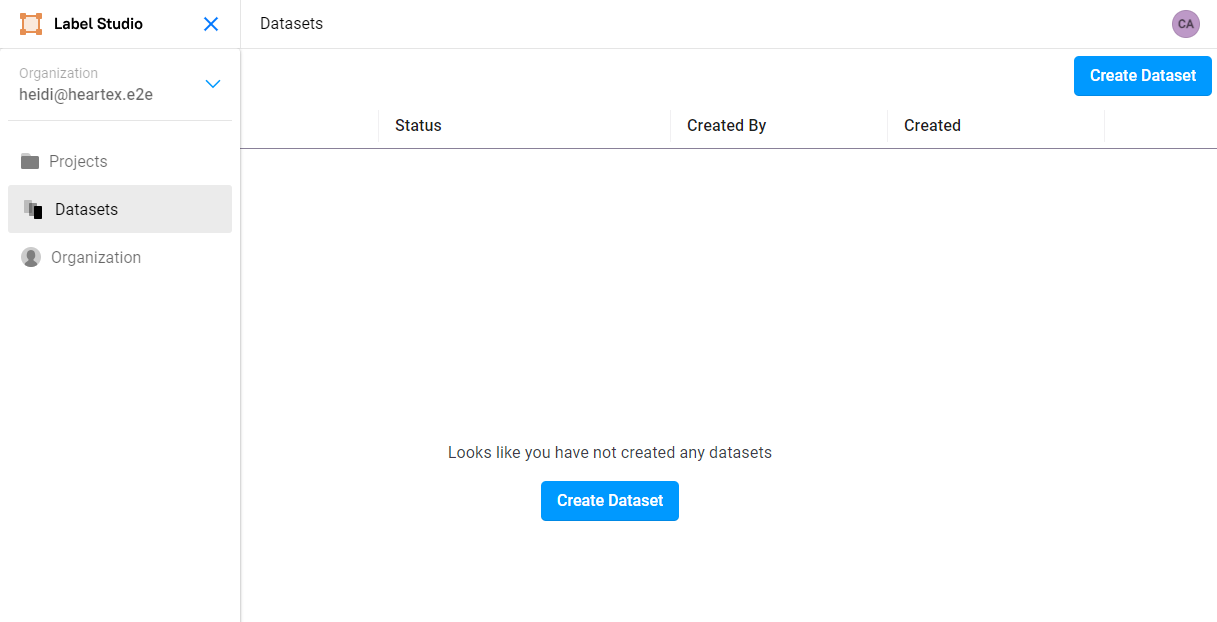
From Label Studio, navigate to the Datasets page and click Create Dataset.
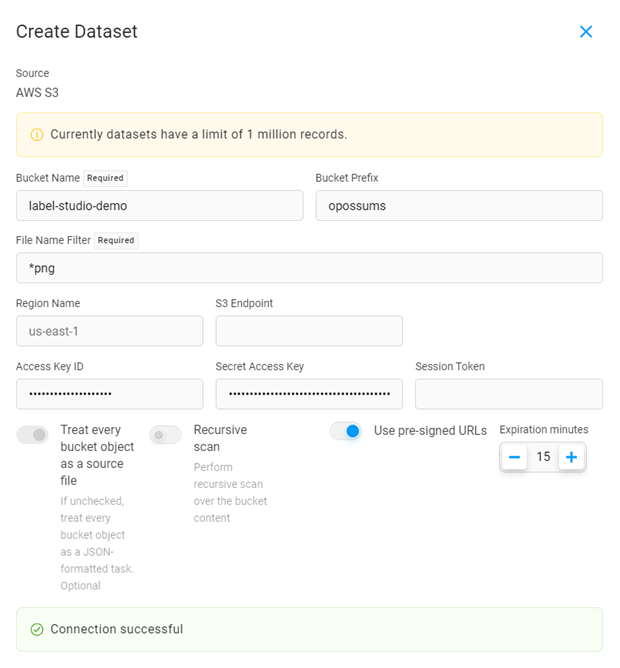
Complete the following fields and then click Next:
Name Enter a name for the dataset. Description Enter a brief description for the dataset. Source Select AWS S3. Complete the following fields:
Bucket Name Enter the name of the AWS S3 bucket. Bucket Prefix Enter the folder name within the bucket that you would like to use. For example, data-set-1ordata-set-1/subfolder-2.File Name Filter Use glob format to filter which file types to sync. For example, to sync all JPG files, enter *jpg. To sync all JPG and PNG files, enter**/**+(jpg|png).
At this time, we support the following file types: .jpg, .jpeg, .png, .txt, .textRegion Name By default, the region is us-east-1. If your bucket is located in a different region, overwrite the default and enter your region here. Otherwise, keep the default.S3 Endpoint Enter an S3 endpoint if you want to override the URL created by S3 to access your bucket. Access Key ID Enter the ID for the access key you created in AWS. Ensure this access key has read permissions for the S3 bucket you are targeting (see Create an AWS access key above). Secret Access Key Enter the secret portion of the access key you created earlier. Session Token If you are using a session token as part of your authorization (for example, MFA), enter it here. Treat every bucket object as a source file Enabled - Each object in the bucket will be imported as a separate record in the dataset.
You should leave this option enabled if you are importing a bucket of unstructured data files such as JPG, PNG, or TXT.
Disabled - Disable this option if you are importing structured data, such as JSON or CSV files.
NOTE: At this time, we only support unstructured data. Structured data support is coming soon.Recursive scan Perform recursive scans over the bucket contents if you have nested folders in your S3 bucket. Use pre-signed URLs If your tasks contain s3://…links, they must be pre-signed in order to be displayed in the browser.Expiration minutes Adjust the counter for how many minutes the pre-signed URLs are valid. Click Check Connection to verify your credentials. If your connection is valid, click Next.
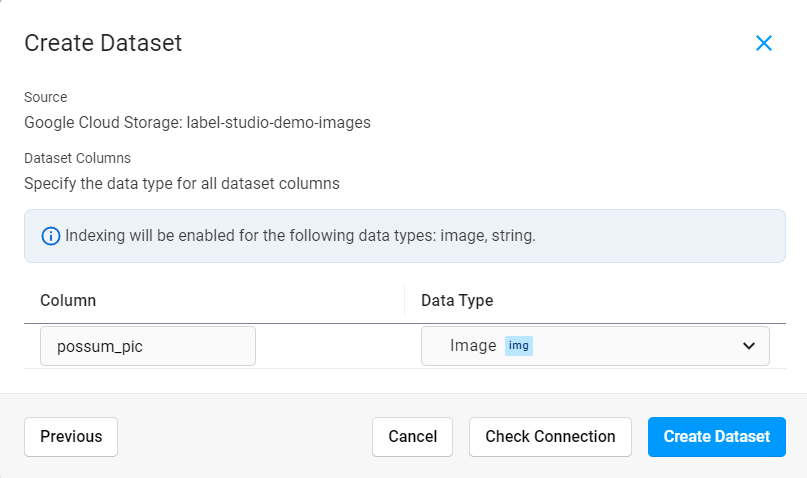
Provide a name for your dataset column and select a data type. The data type that you select tells Label Studio how to store your data in a way that can be searched using an AI-powered semantic search.
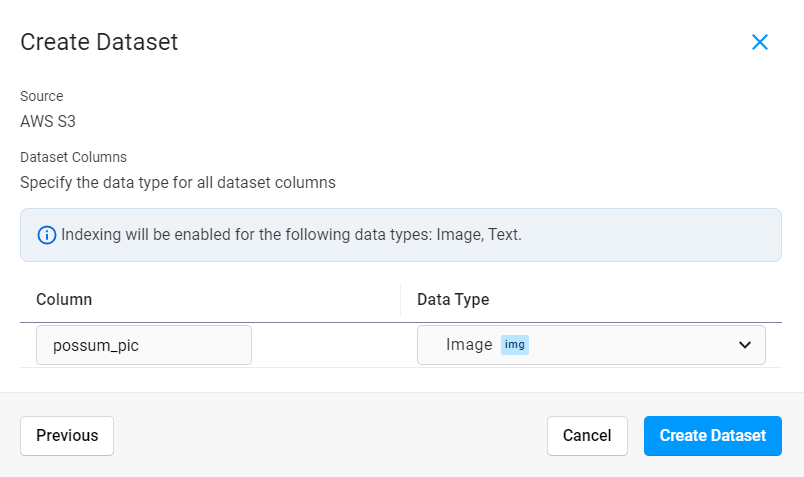
Click Create Dataset.
Data sync initializes immediately after creating the dataset. Depending on how much data you have, syncing might take several minutes to complete.
Datasets using Google Cloud Storage
Requirements:
- Your data is located in a Google Cloud Storage bucket.
- You have a Google Cloud access key with view permissions for the Google Cloud Storage bucket.
- Your Google Cloud Storage bucket has CORS configured.
Configure CORS for the Google Cloud Storage bucket
Configuring CORS allows you to view the data in Label Studio. When CORS is not configured, you are only able to view links to the data.
Prerequisites:
- You have installed the gcloud CLI. For more information, see Google Cloud Documentation - Install the gcloud CLI.
- You have edit access to the bucket.
Configure CORS access to your bucket
Set up cross-origin resource sharing (CORS) access to your bucket using a policy that allows GET access from the same host name as your Label Studio deployment.
For instructions, see Configuring cross-origin resource sharing (CORS) in the Google Cloud User Guide.
You can use or modify the following example:
echo '[
   {
      "origin": ["*"],
      "method": ["GET"],
      "responseHeader": ["Content-Type","Access-Control-Allow-Origin"],
      "maxAgeSeconds": 3600
   }
]' > cors-config.json
Replace YOUR_BUCKET_NAME with your actual bucket name in the following command to update CORS for your bucket:
gsutil cors set cors-config.json gs://YOUR_BUCKET_NAMECreate an access key for Google Cloud Storage
Prerequisites:
- You must have the appropriate Google Cloud permissions to create a service account.
- If you have not yet used a service account in your Google Cloud project, you may need to enable the service account API. See Create service accounts in the Google Cloud documentation.
Create a service account
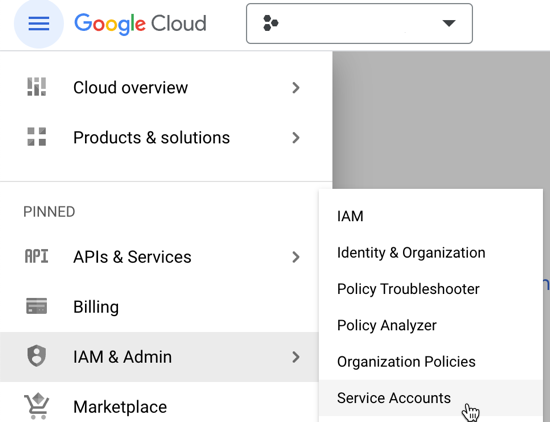
From the Google Cloud console, go to IAM & Admin > Service Accounts.
Click Create service account and complete the following fields:
Service account name Enter a name for the service account that will appear in the console. Service account ID The account ID is generated from the service name. Description Optionally, provide a description for the service account. Click Create and continue.
When selecting a role, use the search fields provided to select the Storage Object Viewer role.
Optionally, you can link the service account to a user or group. For more information, see Manage access to service accounts in the Google Cloud documentation.
Click Done.
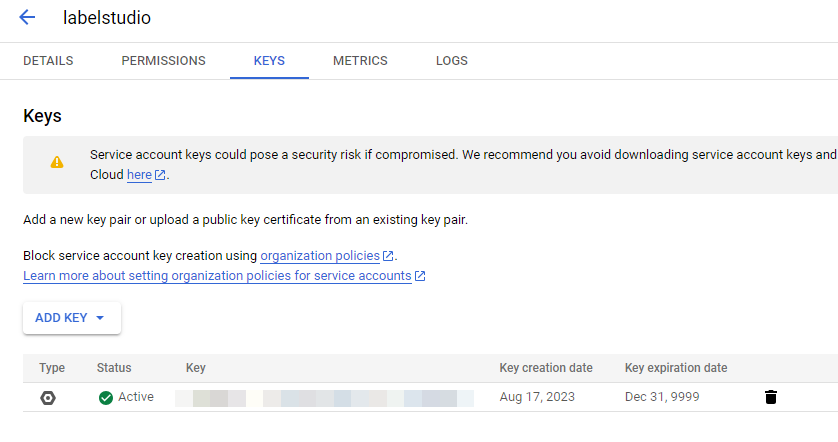
Generate a key for the service account
- From the Service Accounts page in the Google Cloud console, click the name of the service account you just created to go to its details.
- Select the Keys tab.
- Select Add key > Create new key.
- Select JSON and then click Create.
The private key is automatically downloaded. This is the only time you can download the key.
Create a dataset from Google Cloud Storage
From Label Studio, navigate to the Datasets page and click Create Dataset.
Complete the following fields and then click Next:
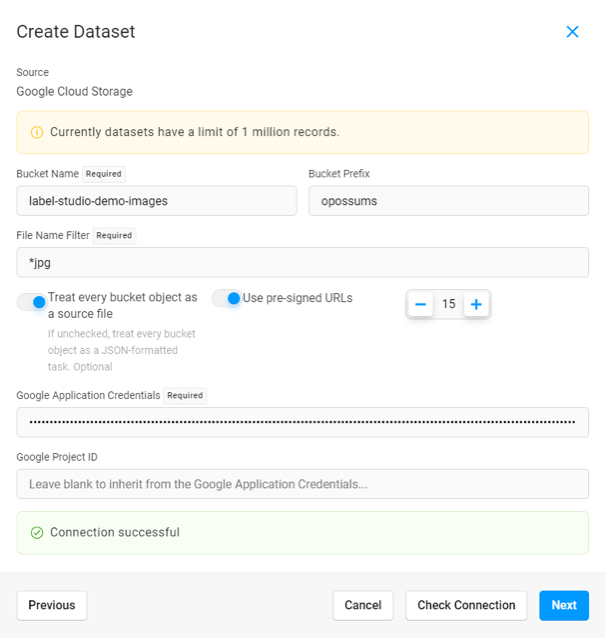
Name Enter a name for the dataset. Description Enter a brief description for the dataset. Source Select Google Cloud Storage Complete the following fields:
Bucket Name Enter the name of the Google Cloud bucket. Bucket Prefix Optionally, enter the folder name within the bucket that you would like to use. For example, data-set-1ordata-set-1/subfolder-2.File Name Filter Use glob format to filter which file types to sync. For example, to sync all JPG files, enter *jpg. To sync all JPG and PNG files, enter**/**+(jpg|png).
At this time, we support the following file types: .jpg, .jpeg, .png, .txt, .textTreat every bucket object as a source file Enabled - Each object in the bucket will be imported as a separate record in the dataset.
You should leave this option enabled if you are importing a bucket of unstructured data files such as JPG, PNG, or TXT.
Disabled - Disable this option if you are importing structured data, such as JSON or CSV files.
NOTE: At this time, we only support unstructured data. Structured data support is coming soon.Use pre-signed URLs If your tasks contain gs://…links, they must be pre-signed in order to be displayed in the browser.Pre-signed URL counter Adjust the counter for how many minutes the pre-signed URLs are valid. Google Application Credentials Copy and paste the full contents of the JSON file you downloaded when you created your service account key (see above). Google Project ID Optionally, you can specify a specific Google Cloud project. In most cases, you can leave this blank to inherit the project from the application credentials. Click Check Connection to verify your credentials. If your connection is valid, click Next.
Provide a name for your dataset column and select a data type. The data type that you select tells Label Studio how to store your data in a way that can be searched using an AI-powered semantic search.
Click Create Dataset.
Data sync initializes immediately after creating the dataset. Depending on how much data you have, syncing might take several minutes to complete.
Datasets using Microsoft Azure
Requirements:
- Your data is saved as blobs in an Azure storage account. We do not currently support Azure Data Lake.
- You have access to retrieve the storage account access key.
- Your storage container has CORS configured properly. Configuring CORS allows you to view the data in Label Studio. When CORS is not configured, you are only able to view links to the data.
Configure CORS for the Azure storage account
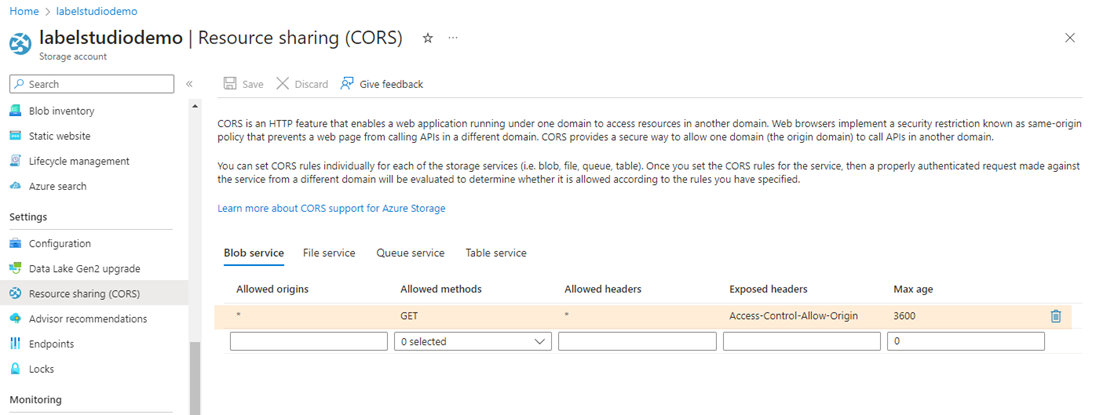
Configure CORS at the storage account level.
In the Azure portal, navigate to the page for the storage account.
From the menu on the left, scroll down to Settings > Resource sharing (CORS).
Under Blob service add the following rule:
- Allowed origins:
* - Allowed methods:
GET - Allowed headers:
* - Exposed headers:
Access-Control-Allow-Origin - Max age:
3600
- Allowed origins:
Click Save.
Retrieve the Azure storage access key
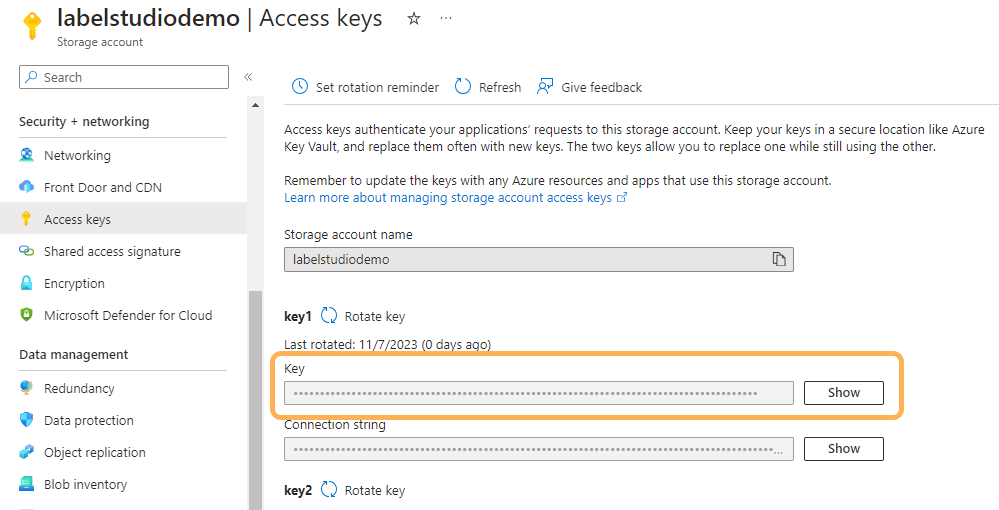
Get the Azure storage account access key
When you create a storage account, Azure automatically generates two keys that will provide access to objects within that storage account. For more information about keys, see Azure documentation - Manage storage account access keys.
- Navigate to the storage account page in the portal.
- From the menu on the left, scroll down to Security + networking > Access keys.
- Copy the key value for either Key 1 or Key 2.
Create a dataset from an Azure blob storage container
From Label Studio, navigate to the Datasets page and click Create Dataset.
Complete the following fields and then click Next:
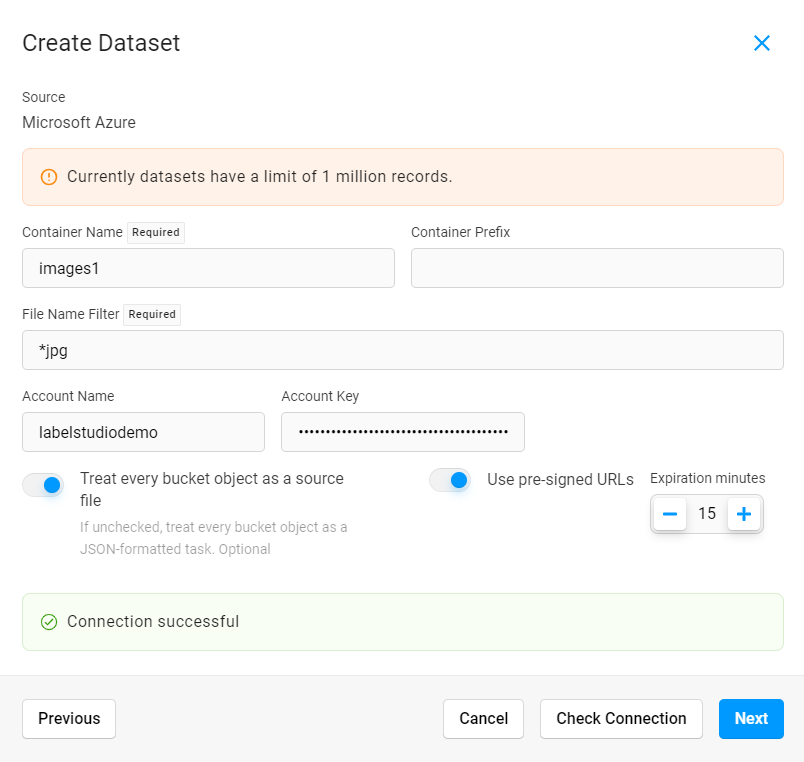
Name Enter a name for the dataset. Description Enter a brief description for the dataset. Source Select Microsoft Azure. Complete the following fields:
Container Name Enter the name of a container within the Azure storage account. Container Prefix Enter the folder name within the container that you would like to use. For example, data-set-1ordata-set-1/subfolder-2.File Name Filter Use glob format to filter which file types to sync. For example, to sync all JPG files, enter *jpg. To sync all JPG and PNG files, enter**/**+(jpg|png).
At this time, we support the following file types: .jpg, .jpeg, .png, .txt, .textAccount Name Enter the name of the Azure storage account. Account key Enter the access key for the Azure storage account (see Retrieve the Azure storage access key above). Treat every bucket object as a source file Enabled - Each object in the bucket will be imported as a separate record in the dataset.
You should leave this option enabled if you are importing a bucket of unstructured data files such as JPG, PNG, or TXT.
Disabled - Disable this option if you are importing structured data, such as JSON or CSV files.
NOTE: At this time, we only support unstructured data. Structured data support is coming soon.Use pre-signed URLs If your tasks contain azure-blob://…links, they must be pre-signed in order to be displayed in the browser.Expiration minutes Adjust the counter for how many minutes the pre-signed URLs are valid. Click Check Connection to verify your credentials. If your connection is valid, click Next.
Provide a name for your dataset column and select a data type. The data type that you select tells Label Studio how to store your data in a way that is searchable.
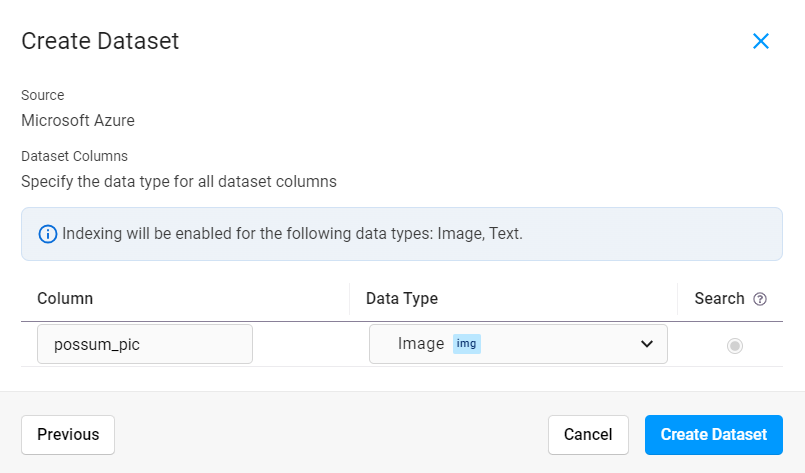
Click Create Dataset.
Data sync initializes immediately after creating the dataset. Depending on how much data you have, syncing might take several minutes to complete.