Set up SCIM2 for Label Studio
System for Cross-domain Identity Management (SCIM) is a popular protocol to manage access for services and applications across an organization. This guide helps to set up SCIM integration to manage access to Label Studio Enterprise in your organization.
Using SCIM provider, you can manage access to Label Studio Enterprise workspaces, grant roles to individual users and groups.
Requirements
SCIM interacts with your SSO integration.
note
Okta or similar SSO providers have SCIM integration based on SSO.
important
If you do not have SSO set up yet, then follow Set up SSO.
important
Only owner's access token can be used for SCIM Identity Provider.
Label Studio Enterprise uses SCIM Version 2.0 standard. As an example, this page uses integration with Okta. However, Label Studio Enterprise follows SCIM RFC 5741 and can be integrated with any access management services that support the standard.
For more information on how SCIM workflows, see How SCIM works with Label Studio Enterprise.
Set up SCIM integration
Check this video tutorial about SCIM and Okta setup.
important
This video demonstrates the use of userName in the 'Unique Identifier Field for Users' field. It is essential to use email as the unique identifier instead of userName; otherwise, SCIM will not function correctly with users who were created prior to the SCIM integration.
To manage access to Label Studio Enterprise, add the application to your SCIM provider (Okta). Okta uses Bearer (request header should be Authorization: Bearer <token>) token to interact with REST API endpoints of the application to provision and deprovision access.
Add Label Studio Enterprise (if not complete)
- Navigate to Applications → Applications in Okta. Click Create App Integration.
- Select SAML 2.0. Fill App name (for example, Label Studio Enterprise).
- On the next step Configure SAML set up SAML integration following the instructions to Set up SSO guide.
- Make sure Label Studio Enterprise appears in the list of active applications.
Enable SCIM provisioning
- Navigate to Applications → Applications in Okta.
- Select Label Studio Enterprise.
- Go to General tab and check Enable SCIM provisioning.
- Switch to Provisioning tab.
- Select Integration in the left menu.
- Click Edit in the right corner.
Fill in the fields:
- SCIM connector base URL:
https://<LABEL_STUDIO_BASE_URL>/scim/v2/where<LABEL_STUDIO_BASE_URL>is the base URL of your Label Studio Enterprise instance. - Unique identifier field for users: Use
email. Label Studio Enterprise uses email as user identifier in this field. - Supported provisioning actions: Select the following items:
- Import New Users and Profile Updates
- Push New Users
- Push Profile Updates
- Push Groups
- HTTP Header →
Authorization: Bearer <token>: Put the Bearer token from the LSE owner’s account profile. In case of Label StudioTokenandBearerare the same tokens. However, it’s important to useBearerinstead ofTokenin the request header.
SCIM settings and application triggers
- On the application page navigate to Provisioning tab and select To App in the left menu. Click Edit in the right corner.
- Enable the following items:
- Create Users
- Update User Attributes
- Deactivate Users
Assign the application to a single user
You can assign the application on both the user page and application page.
- On the application page navigate to Assignments tab.
- Click Assign and select Assign to People.
- Select the people you would like to be added to Label Studio Enterprise.
- Click Done.
After you click Done, Okta will send the requests to create users accordingly in the Label Studio Enterprise.
Unassigning the application for users
- On the application page navigate to Assignments tab.
- Select People in the left menu.
- Click the delete cross against the user you would like to unassign.
- Confirm the unassignment.
Assign the application to a group
The most convenient way to manage access to the application is via groups. You can assign Label Studio to groups and manage the groups in Okta. The changes will be propagated to the application.
Set up group mapping
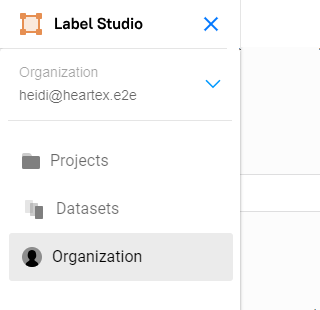
In Label Studio, click the menu in the upper left and select Organization.
If you do not see the option to select Organization, you are not logged in with the appropriate role.
Select SCIM in the upper right.
Update roles and workspaces mapping. Ensure the group name you enter is the same as the group name being sent by your SCIM provider.
Organization Roles to Groups Mapping—Map groups to roles at the organization level. The role set at the organization level is the default role of the user and is automatically assigned to workspaces and projects. For more information on roles, see Roles in Label Studio Enterprise.
You can map multiple groups to the same role. Note that users who are Not Activated or Deactivated do not count towards the seat limit for your account.
Workspaces to Groups Mapping—Add groups as members to workspaces. Users with Manager, Reviewer, or Annotator roles can only see workspaces after they’ve been added as a member to that workspace.
Select an existing workspace or create a new one. You can map multiple groups to the same workspace.
Projects to Groups Mapping—Map groups to roles at the project level. Project-level roles can be Annotator, Reviewer, or Inherit.
You can map a group to different roles across multiple projects. You can also map multiple groups to the same roles and the same projects. For more information on roles, see Roles in Label Studio Enterprise.
If you select Inherit, the group will inherit the role set above under Organization Roles to Groups Mapping. If the group is inheriting the Not Activated role, the users are mapped to the project, but they are not actually assigned to the project until the group is synced (meaning that the user authenticates first).
Assign a group to the application
- Using Okta, navigate to the application page and open the Assignments tab.
- Select Assign → Assign to Groups and choose the group.
- Set attribute Active to true.
After saving the group assignment, the update will be queued and sent to Label Studio.
note
Alternatively, you can push the changes immediately to Label Studio.
Sync groups to the application
- Using Okta, navigate to the application page and open the Push Groups tab.
- Click Push Groups and select Find groups by name.
- Find the group you would like to sync to Label Studio.
- Choose either Create Group or Link Group, if you already have a workplace with the same name as specified on the SCIM >> Settings page.
Unassigning the application for groups
To unassign a group from the application, follow the steps for Unassigning the application for users.
- On the application page, navigate to the Assignments tab.
- Select Group in the left menu.
- Click the delete cross against the group you would like to unassign.
- Confirm the unassignment.
Check this video tutorial to remove a user and group.