Integrate Label Studio into your machine learning pipeline
You can use an ML backend to integrate your model development pipeline with your data labeling workflow. There are several use cases, including:
- Pre-annotate/autolabel data: Let ML/AI models predict labels autonomously, which can then be reviewed by human annotators.
- Interactive labeling: Integrate ML models into the platform to help humans label or annotate large datasets more efficiently and accurately.
- Model evaluation and fine-tuning: Labelers review and analyze the model outputs to assess model accuracy and optimize performance.
For example, for an image classification task, the model pre-selects an image class for data annotators to verify. For audio transcriptions, the model displays a transcription that data annotators can modify.
Once a model is connected, the way it works is:
- A user opens the task.
- Label Studio sends the request to ML backend.
- The ML backend responds with its prediction.
- The prediction is loaded into the Label Studio UI and shown to the annotator.
If you just need to load static pre-annotated data into Label Studio, running an ML backend might be overkill for you. Instead, you can import preannotated data.
Tip
You can use Label Studio Enterprise to build an automated active learning loop with a machine learning model backend. If you use the open source Community Edition of Label Studio, you can manually sort tasks and retrieve predictions to mimic an active learning process.
Set up an example ML backend
The Label Studio ML backend is an SDK that wraps your machine learning code and turns it into a web server. The web server can be connected to a running Label Studio instance to automate labeling tasks. We have provided a library of example models that you can use in your own workflow, or extend and customize as needed.
Ir you want to write your own model instead, see Write your own ML backend.
Prerequisites
Start the model
First, decide which model you want to use and check for required parameters (click the link for each model to see a full parameter list).
Set your parameters in the
docker-compose.ymlfile that is located within the model directory.Then replace
{MODEL_NAME}in the below command with the appropriate directory.For example, if you are using the SAM backend with SegmentAnything model, the model name would be
segment_anything_model, which matches the directory name in the repo:git clone https://github.com/HumanSignal/label-studio-ml-backend.git cd label-studio-ml-backend/label_studio_ml/examples/segment_anything_model docker-compose up
The model should begin running at http://localhost:9090 (if you are using a Docker container, see the note below). You can verify this by clicking Send Test Request from the overflow menu next to the model or by using the following command:
> curl http://localhost:9090
{"model_class":"SamMLBackend","status":"UP"}
If you see any errors, see Troubleshooting ML Backends & Predictions in the HumanSignal support center and see the Troubleshooting section in the README.
localhost and Docker containers
localhost is a special domain name that loops back directly to your local environment.
If you are running Label Studio in a Docker container, localhost loops back to the container itself, and not the machine that the container is hosted on. Docker provides a special domain as a workaround for this, docker.host.internal. If you’re hosting Label Studio and your ML Backend inside of Docker, try using that domain instead of localhost (http://host.docker.internal:9090) or the internal IP address.
Connect the model to Label Studio
After you create a project, open the project settings and select Model.
Click Connect Model and complete the following fields:
| Field | Description |
|---|---|
| Name | Enter a name for the model. |
| Backend URL | Enter a URL for the model. If you are following the steps above, this would be http://localhost:9090. If you are running Label Studio in a Docker container, see the note above. |
| Select authentication method | If a username and password are required to access the model, you can select Basic Authentication and enter them here. |
| Extra params | Enter any additional parameters you want to pass to the model. |
| Interactive preannotations | Enable this option to allow the model to assist with the labeling process by providing real-time predictions or suggestions as annotators work on tasks. In other words, as you interact with data (for example, by drawing a region on an image, highlighting text, or asking an LLM a question), the ML backend receives this input and returns predictions based on it. For more information, see Interactive pre-annotations below. |
Tip
You can also add an ML backend using the API. You will need the project ID and the machine learning backend URL.
Example models
The ML backend repo includes a variety of example models that you can experiment with and adapt for your own workflow.
Some of them work without any additional configuration. Check the Required parameters column to see if you need to set any additional parameters. If the model has required parameters, you can set those parameters in docker-compose.yml within the model directory.
- Pre-annotation column indicates if the model can be used for pre-annotation in Label Studio:
you can see pre-annotated data when opening the labeling page or after running predictions for a batch of data. - Interactive mode column indicates if the model can be used for interactive labeling in Label Studio: see
interactive predictions when performing actions on labeling page. - Training column indicates if the model can be used for training in Label Studio: update the model state based the
submitted annotations.
| MODEL_NAME | Description | Pre-annotation | Interactive mode | Training | Required parameters |
|---|---|---|---|---|---|
| segment_anything_model | Image segmentation by Meta | ❌ | ✅ | ❌ | None |
| llm_interactive | Prompt engineering with OpenAI, Azure LLMs. | ✅ | ✅ | ✅ | OPENAI_API_KEY |
| grounding_dino | Object detection with prompts. Details | ❌ | ✅ | ❌ | None |
| tesseract | Interactive OCR. Details | ❌ | ✅ | ❌ | None |
| easyocr | Automated OCR. EasyOCR | ✅ | ❌ | ❌ | None |
| spacy | NER by SpaCy | ✅ | ❌ | ❌ | None |
| flair | NER by flair | ✅ | ❌ | ❌ | None |
| bert_classifier | Text classification with Huggingface | ✅ | ❌ | ✅ | None |
| huggingface_llm | LLM inference with Hugging Face | ✅ | ❌ | ❌ | None |
| huggingface_ner | NER by Hugging Face | ✅ | ❌ | ✅ | None |
| nemo_asr | Speech ASR by NVIDIA NeMo | ✅ | ❌ | ❌ | None |
| mmdetection | Object Detection with OpenMMLab | ✅ | ❌ | ❌ | None |
| sklearn_text_classifier | Text classification with scikit-learn | ✅ | ❌ | ✅ | None |
| interactive_substring_matching | Simple keywords search | ❌ | ✅ | ❌ | None |
| langchain_search_agent | RAG pipeline with Google Search and Langchain | ✅ | ✅ | ✅ | OPENAI_API_KEY, GOOGLE_CSE_ID, GOOGLE_API_KEY |
Model training
Training a model allows it to learn from submitted annotations and potentially improve its predictions for subsequent tasks.
After you connect a model to Label Studio as a machine learning backend and annotate at least one task, you can start training the model. You can use automated or manual training.
From the Model page under project settings, select Start Training from the overflow menu next to the connected model. This manually initiates training. Use this action if you want to control when the model training occurs, such as after a specific number of annotations have been collected or at certain intervals.
You can also initiate training programmatically using the following:
- From the API, specify the ID of the machine learning backend and run the following command:
See the Train API documentation for more.curl -X POST http://localhost:8080/api/ml/{id}/train
Training logs appear in stdout and the console.
To see more detailed logs, start the ML backend server with the --debug option.
Pre-annotations/predictions
note
The terms "predictions" and pre-annotations" are used interchangeably.
Get predictions from a model
After you connect a model to Label Studio, you can see model predictions in the labeling interface if the model is pre-trained, or right after it finishes training.
- To manually add predictions, go to the Data Manager, select the tasks you want to get predictions for, and then select Actions > Retrieve predictions.
- To automatically pre-label data with predictions, go to the project settings and enable Annotation > Use predictions to prelabel tasks and ensure that you have selected the appropriate model from the Select which predictions or which model you want to use drop-down menu.
note
For a large dataset, the HTTP request to retrieve predictions might be interrupted by a timeout. If you want to get all predictions for all tasks in a dataset from connected machine learning backends, make a POST call to the predictions endpoint of the Label Studio API for each task to prompt the machine learning backend to create predictions for the tasks.
If you want to retrieve predictions manually for a list of tasks using only an ML backend, make a POST request to the /predict URL of your ML backend with a payload of the tasks that you want to see predictions for, formatted like the following example:
{
  "tasks": [
    {"data": {"text":"some text"}}
  ]
}
Interactive pre-annotations
ML-assisted labeling with interactive pre-annotations works with image segmentation and object detection tasks using rectangles, ellipses, polygons, brush masks, and keypoints, as well as with HTML and text named entity recognition tasks. Your ML backend must support the type of labeling that you’re performing, recognize the input that you create, and be able to respond with the relevant output for a prediction.
Either enable the Interactive preannotations option when adding a model, or use the Edit action from the project settings page to enable/disable this option.
Smart tools
Smart tools duplicate the tools that you have set up to use through your labeling configuration (e.g. rectangles) to allow interaction with the ML backend. Smart tools are currently available for Rectangle, Ellipse, Polygon, KeyPoint, and Brush tags.
Smart tools are dynamic and can change behavior or appearance based on the context, leveraging machine learning predictions. For example, smart tools can automatically detect and suggest annotations for objects in images, which annotators can then review and refine. This can significantly speed up the labeling process, especially when dealing with large datasets.
Smart tools use context to adapt their behavior based on the current state of the labeling environment and the specific needs of the task at hand. For instance, they might alter their functionality depending on the type of data being labeled or the particular region of interest within a task. When smart tools are enabled for a labeling task, they can interact with the ML backend by sending data to the /predict endpoint to receive predictions. These predictions are then used to provide interactive pre-annotations within the labeling interface. For more information, see Support interactive pre-annotations in your ML backend.
For example, when an annotator starts labeling an image, the smart tool can send the image to the ML backend, which processes it and returns suggested annotations (like bounding boxes or segmentation masks) that the annotator can accept, reject, or refine. This process helps streamline the labeling workflow by providing a starting point for annotations based on the model’s current understanding of the data.
To use smart tools:
- Smart tools appear by default if Auto-annotation is enabled in the labeling interface.
- You can also update your labeling configuration to include the
smart="true"option for the type of labeling you’re performing. - If you only want the smart option to appear and don’t want to perform manual labeling at all, use
smartOnly="true".
For example:
<Brush name="brush" toName="img" smart="true" showInline="true"/>
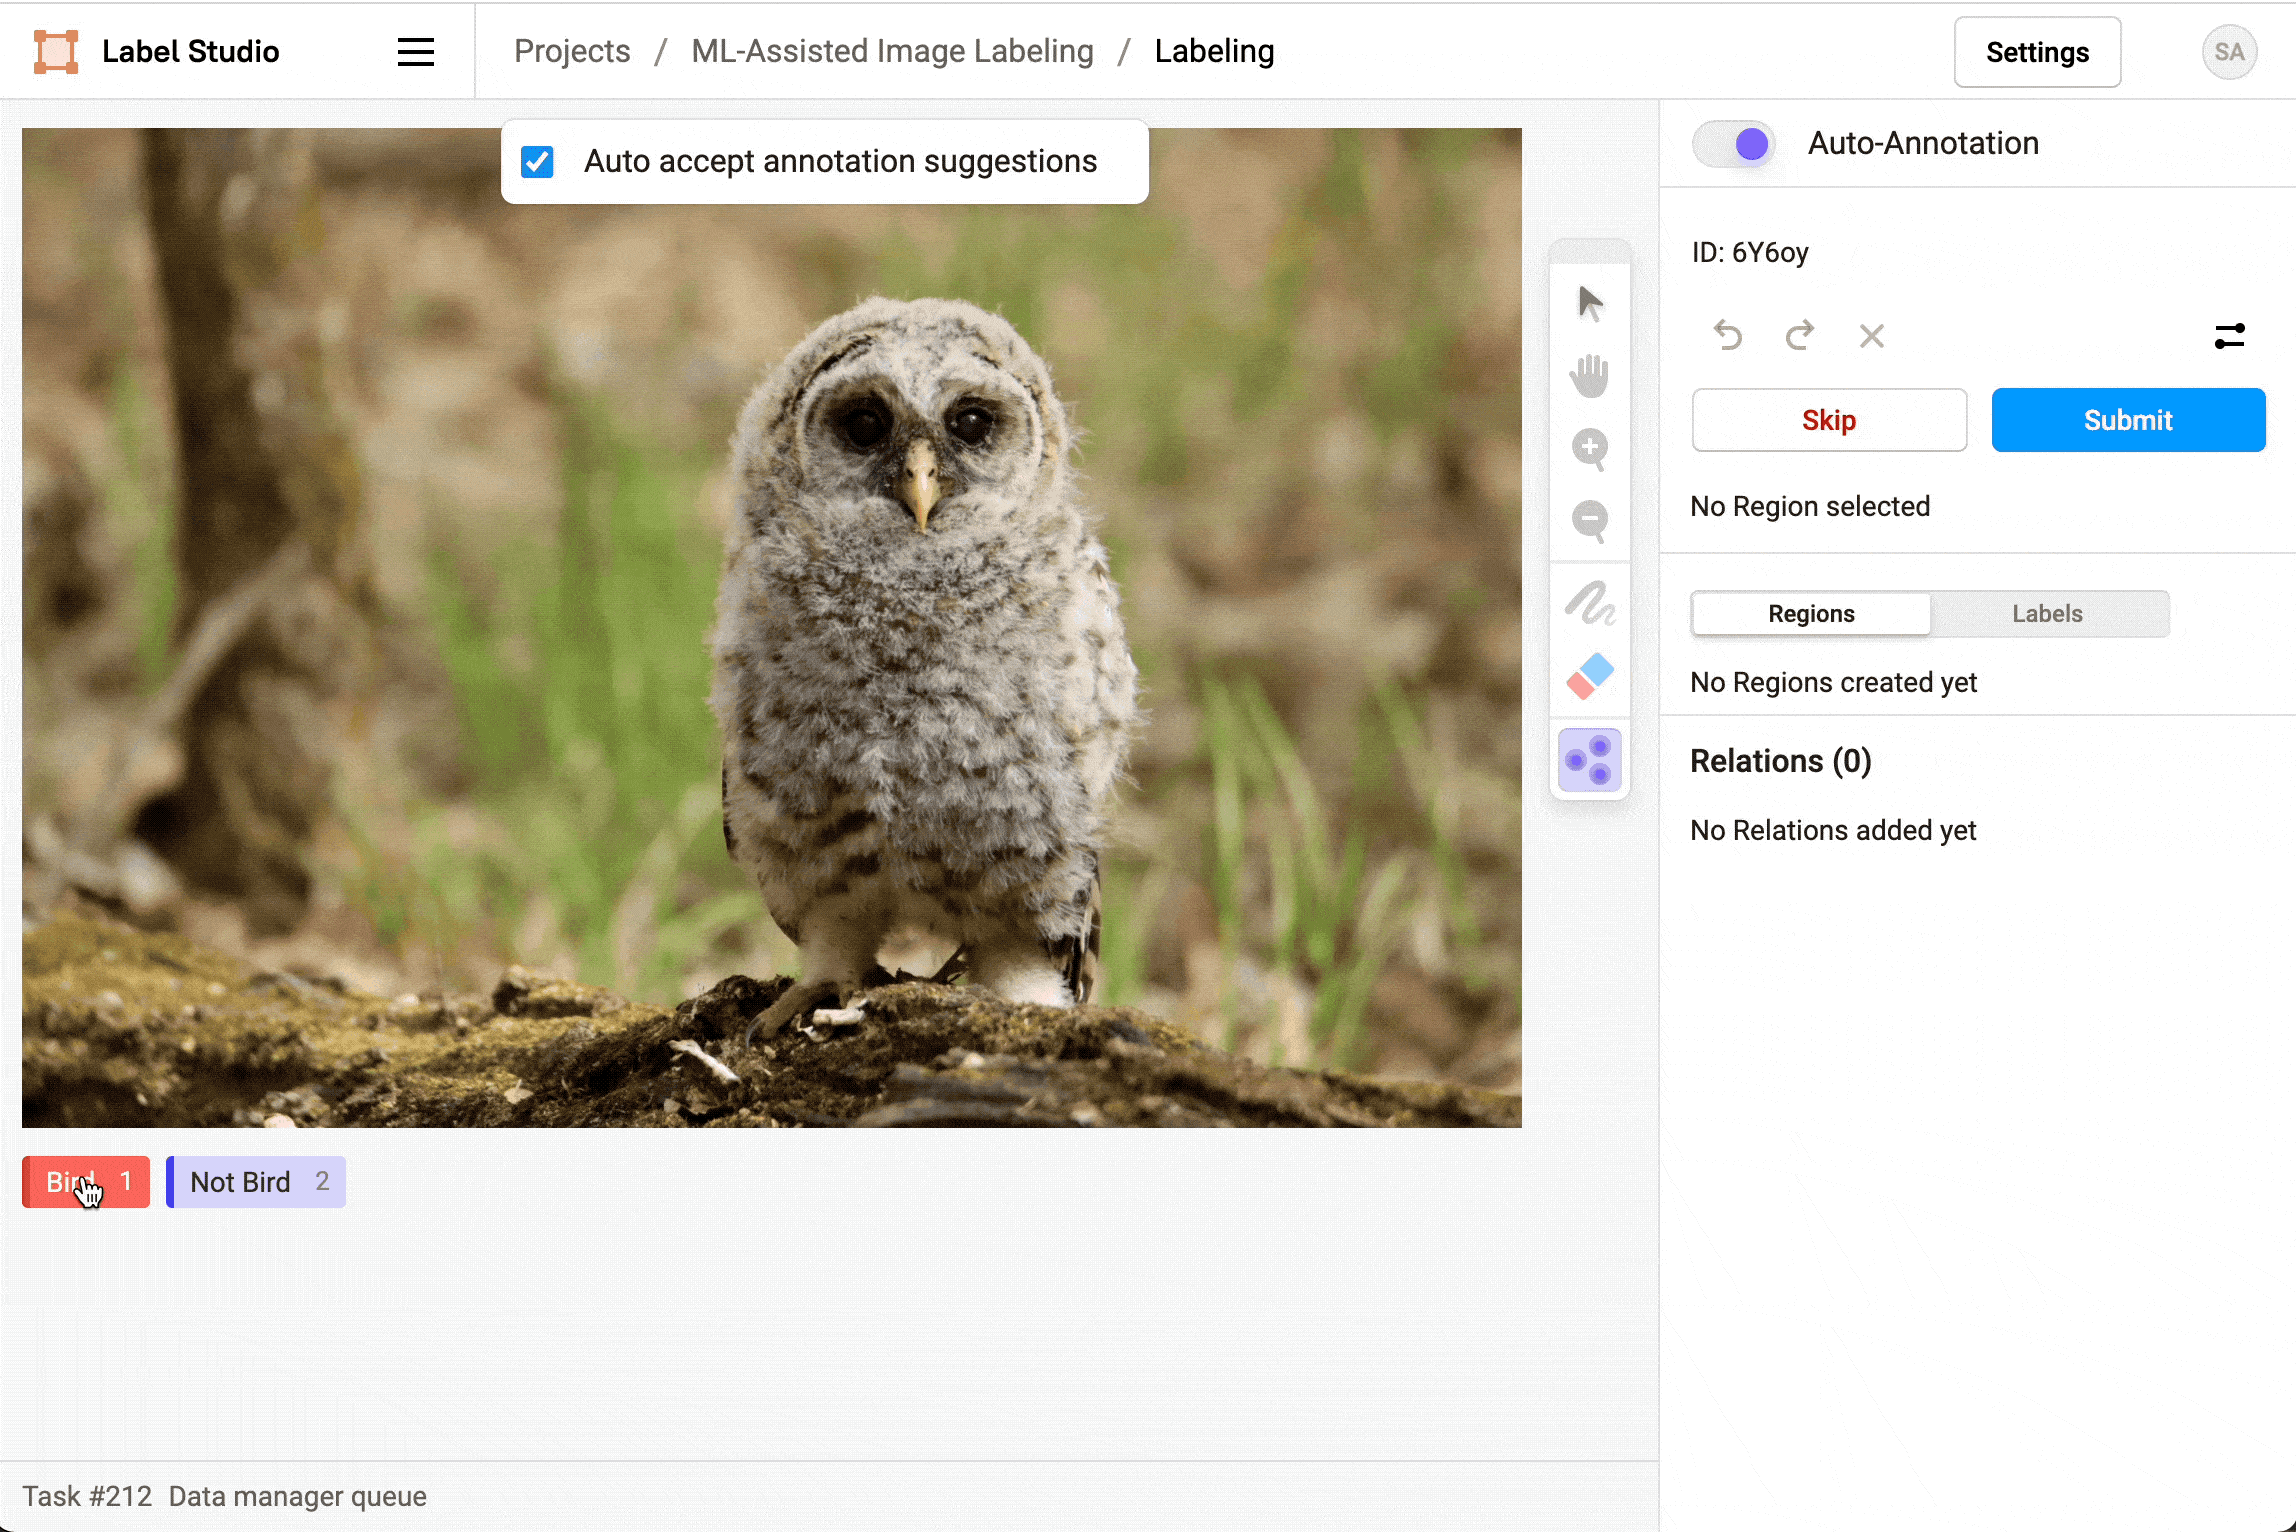
After you start labeling, enable Auto-Annotation to see and use the smart option to draw a shape, mask, or assign a keypoint.
For image labeling, after you enable auto-annotation you can choose whether to Auto accept annotation suggestions. If you automatically accept annotation suggestions, regions show up automatically and are immediately created. If you don’t automatically accept suggestions, the regions appear but you can reject or approve them manually, either individually or all at once.
Delete predictions
If you want to delete all predictions from Label Studio, you can do it using the Data Manager or the API:
- For a specific project, select the tasks that you want to delete predictions for and select Delete predictions from the drop-down menu.
- Using the API, run the following from the command line to delete the predictions for a specific project ID:
curl -H 'Authorization: Token <user-token-from-account-page>' -X POST \
 "<host>/api/dm/actions?id=delete_tasks_predictions&project=<id>"
Choose which predictions to display to annotators
You can choose which model or prediction set to display to annotators by default. This is available under the Annotation > Live Predictions in the project settings.
Use the drop-down menu to select which model or predictions to use in your labeling workflow.